")
Certainly! Here’s a complete SEO-optimized blog post for the title:
🌸 How to Make DIY Flower Arrangements Using Artificial Blooms
Meta Description (SEO, 160 characters):
Learn how to make stunning DIY flower arrangements using artificial blooms! Easy step-by-step guide for creating beautiful, long-lasting floral designs at home.
Introduction
Creating your own flower arrangements can be a fun and rewarding way to bring a touch of nature into your home. Whether you’re looking to decorate your living room, add a personal touch to your wedding, or simply brighten up your office, artificial flowers are the perfect solution.
With a little creativity, DIY artificial flower arrangements can transform any space into something special — and the best part is, they’re easy to make and long-lasting.
Here’s your complete step-by-step guide to creating beautiful, budget-friendly flower arrangements using artificial blooms!
Materials You’ll Need:
Before you get started, gather the following materials:
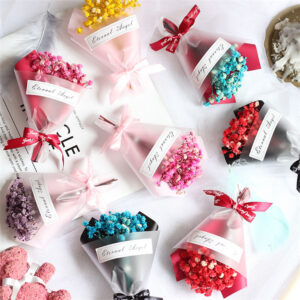
- Artificial flowers (choose your favorite blooms like roses, peonies, daisies, or hydrangeas)
- Floral foam or a vase for holding your flowers
- Wire cutters (for trimming flower stems)
- Hot glue gun or floral tape
- Decorative ribbon (optional, for wrapping stems or adding accents)
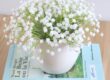
- Greenery or filler flowers (like eucalyptus, ivy, or baby’s breath)
- Vase or container (such as a glass jar, ceramic pot, or metal bucket)
Step 1: Choose Your Artificial Flowers
Why it’s important:
The first step in creating a DIY flower arrangement is selecting the right artificial flowers. Decide on a color palette and a theme for your arrangement. For example:
- Romantic: Opt for soft shades of pink, cream, and white flowers like peonies, roses, and baby’s breath.
- Modern: Bold, vibrant colors like purple, yellow, or orange mixed with greenery give a contemporary feel.
- Bohemian: Go for wildflowers, pampas grass, and rustic tones.
Tip: Mix and match different flower types and sizes to create a more natural and balanced look.
Step 2: Prepare Your Container
Why it matters:
Next, you’ll need to prepare your container or vase. If you’re using floral foam, cut it to fit snugly inside your container. If you’re using a vase without foam, simply fill it with stones, pebbles, or marbles to help anchor your flowers.
Tip: For a rustic look, try using a mason jar or wooden box. For a chic vibe, opt for a sleek, modern glass vase.
Step 3: Trim the Flower Stems
Why it’s essential:
Artificial flowers often come with long stems that need to be trimmed. Use wire cutters to cut the stems to the right length for your arrangement.
How to do it:
- Hold the flower in place over the container and measure how long you want the stem to be.
- Cut the stem, leaving a few extra inches for arranging.
- Repeat this step for all your flowers.
Tip: Keep your flowers slightly longer at first; you can always trim them further once you start arranging.
Step 4: Start with Focal Flowers
Why it’s key:
Begin by placing your focal flowers — these are the larger, more prominent blooms that will draw attention. For example, if you’re using roses, arrange them evenly spaced at the center of your container.
How to do it:
- Arrange the focal flowers first, keeping them the most prominent in your design.
- Space them out, but don’t worry about perfection — you can adjust as you go.
Tip: Place taller flowers toward the center and shorter ones near the edges for a more natural effect.
Step 5: Add Fillers and Greenery
Why they make a difference:
To give your arrangement depth and texture, add filler flowers and greenery (like eucalyptus or ivy). This will soften the arrangement and fill in the gaps between your focal flowers.
How to do it:
- Add your fillers in between the larger flowers.
- Tuck in greenery to cover any exposed foam or stems.
- Use the greenery to add volume and create a balanced shape.
Tip: Keep the fillers and greenery flowing naturally, as if they’re growing organically.
Step 6: Final Touches
Why it’s important:
Once your flowers are arranged, step back and evaluate your work. This is where you can make any adjustments to ensure your arrangement is balanced and looks full.
How to do it:
- Adjust flower placement as needed — you can bend artificial flower stems for a more natural look.
- Add decorative ribbons, pearls, or beads around the base of the arrangement for an extra touch of elegance.
- If you’re using floral foam, apply hot glue to secure the stems in place.
Tip: For a polished look, wrap the base of the stems with a ribbon or twine to hide any exposed foam or wire.
Step 7: Display Your Arrangement
Why this final step is crucial:
Your DIY flower arrangement is now complete! The last step is to choose a perfect spot to display your creation.
Best places to showcase your flowers:
- Living room: Place it on the coffee table or mantle.
- Office: Put it on your desk or in the lobby to create a welcoming atmosphere.
- Wedding: Use them as centerpieces, table runners, or aisle markers.
Tip: To maintain their freshness, regularly dust your artificial flowers with a soft cloth to keep them looking vibrant.
Conclusion
Making your own DIY flower arrangement using artificial blooms is a fun and rewarding project that can bring beauty and color into your home or event. With these simple steps, you can create gorgeous, long-lasting floral designs that will last for years without any of the hassle of maintaining real flowers.
🌸 Ready to get creative? Browse our selection of artificial flowers and start making your own stunning flower arrangements today!
Call to Action
Need help picking out the best artificial flowers for your DIY project? Contact us for expert advice on the perfect blooms for your next floral creation!
Would you like a downloadable step-by-step guide or a floral arrangement checklist? Let me know how I can further assist!